Android is the operating system which is used by everyone, and daily we share screenshots of Games, Apps, Battery, and screen on time every day. We always brag in front of our friends by sharing them the images of the wallpaper and the dope setup of our device. We have daily seen 85% Android users always share the screenshot of their device. Whenever we boot our device into recovery mode, we can’t take a screenshot because our phone is not turned on. Today we are going to tell you the way you can take screenshots in CWM/TWRP recovery mode.
Also Read: How to Take Partial Screenshots on Your Android Device
Whenever we want to take a screenshot on our device, we just press the volume down + Power button to take a screenshot. What if we are in recovery mode. We have seen in the recovery mode we can’t press the volume down + Power button to take a screenshot.
The screenshot feature is in the operating system. If your phone is booted into recovery mode, then you can’t take the screenshot. There are three custom recoveries available for Android, and none of the recoveries has the option to take the screenshot. If you want to enjoy on your device, then you need to download the external software.

Why do we need to take a screenshot of custom recovery?
Sometimes when we try installing any file, we might get an error while installing. We cannot copy paste that error so we can share the screenshot with the developer that we are finding the issue in installing the file on your device.
We can get the response of that query easily. That is the reason why taking a screenshot of custom recovery is necessary.
Also Read: How To Take Full Page Screenshot On Android Phone
Take Screenshots in CWM/TWRP Recovery
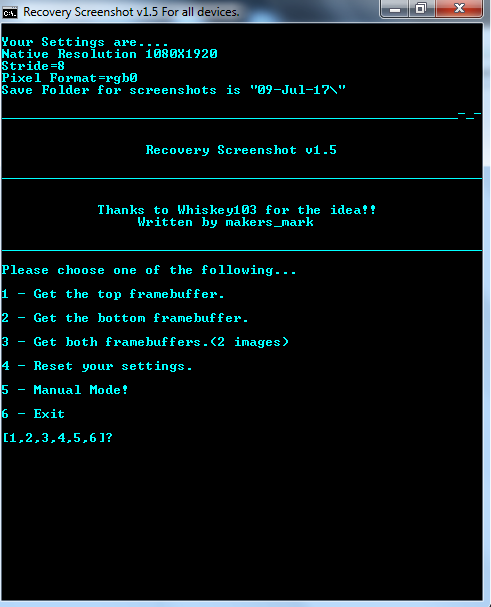
Makers Mark developed an application which helps you to take a screenshot in CWM/TWRP recovery quickly with the support of an external application. You can run this software in windows and take the screenshot of your recovery mode.
This is the simple software which is based on the command line, and you can press the keys to take the screenshot which we will teach you in the below article the way you can take the screenshot while you are in recovery mode.
You don’t need additional software to make this software running on your device. You just need to make sure that USB debugging is turned on. Then you can enjoy it on your device. Let’s dive into it.
Also Read: How to Enable Double Tap to Sleep On Any Android Device [No Root]
Requirements:
- USB Debugging Turned on: Read How-to
- Recovery Screenshot Tool: Download
- 7-zip to extract the files: Download
How to Take Screenshots in CWM/TWRP Recovery
- Reboot your phone into recovery mode. You can turn off your device and press Volume Down + Power Button to boot your device into recovery mode.
- Extract the zip file using 7-zip or WinRAR software.
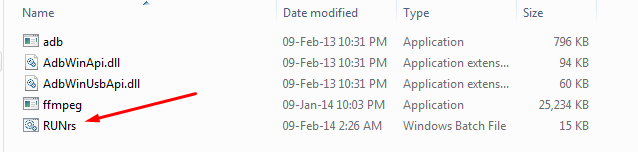
- Open the folder and run RUNrs.bat file on your computer.
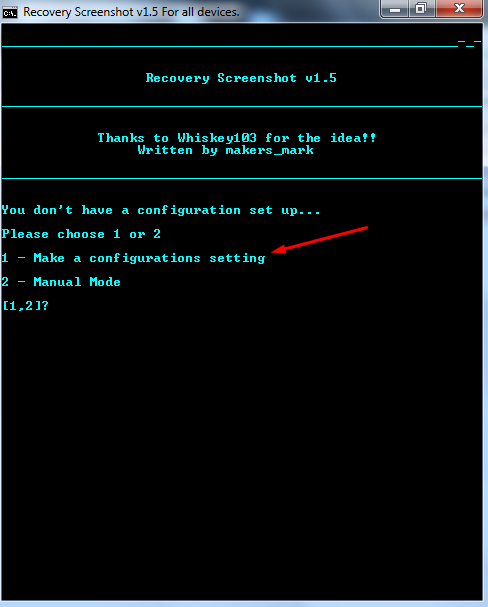
- You will see the command window and click on the “Make a Configuration Settings.“
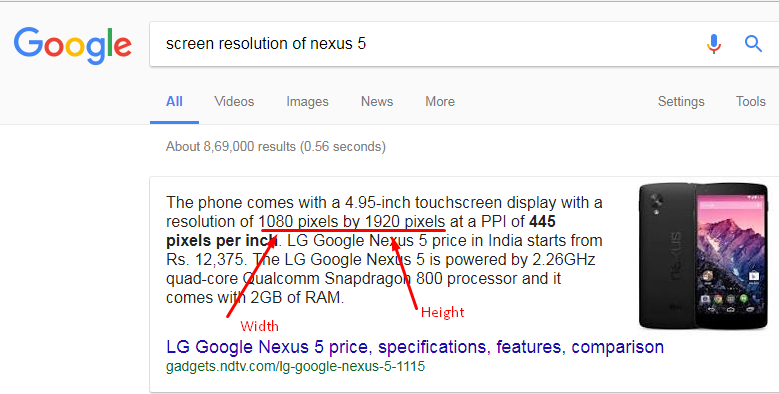
- Now, Google your phone resolution. You can google screen resolution of Nexus 5. You can select for your device.
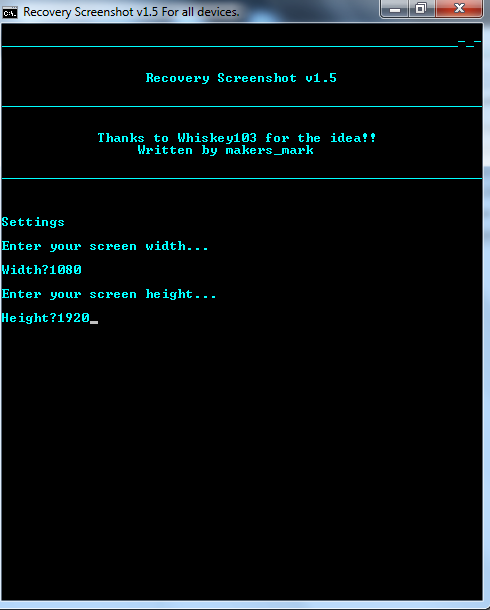
- Now, enter the width and height of your device.
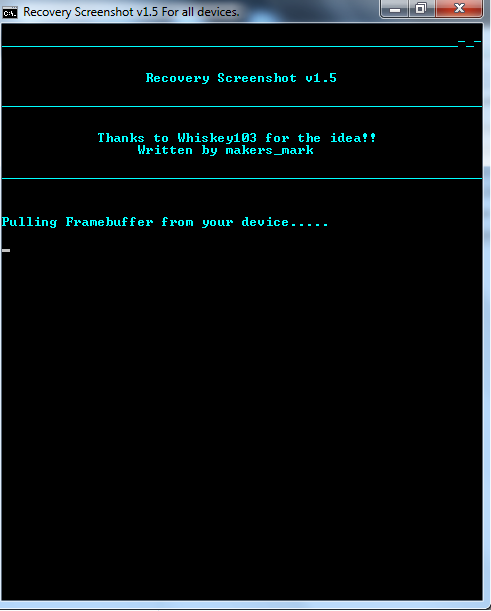
- Wait for some time you will see a screen of pulling framebuffer from your device. Make sure that your device screen is turned on.
- That’s it if successfully done you will see a screen to test the images is in a correct format.

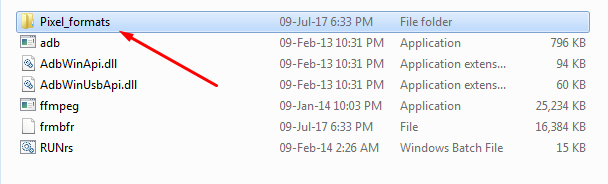
- You will see a new folder name as “Pixel_format” open it, and you will see framebuffer images.
- Check which one is the right screenshot and note the file name.
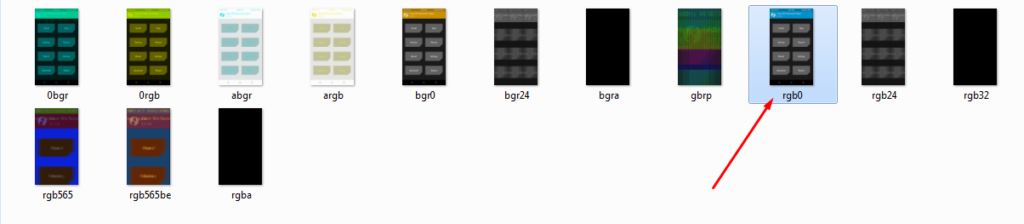
- If you find the image, then press any key to continue.

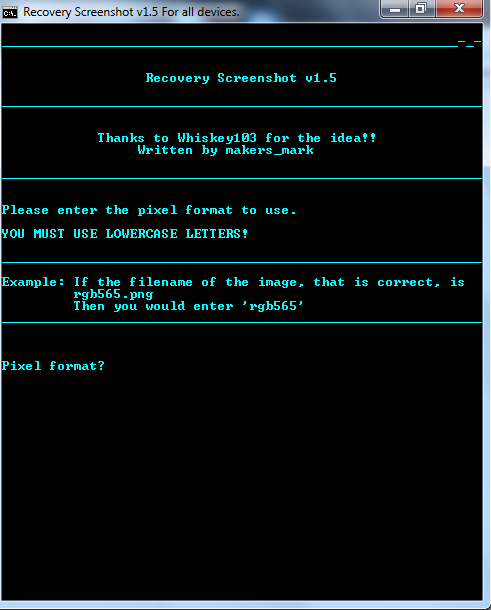
- Now, if you see the picture in correct format press 1 or else, you can press 2 and repeat the process of checking the folder.

- Enter the file name of the right screenshot. That’s it!
- Whenever you want to take a screenshot just press 1 and wait for some time, and you will see a new folder created with the images in it.
- Done! You have taken the screenshot of your favorite recovery.
Final Verdict:
This way you can quickly Take Screenshots in CWM/TWRP Recovery. You cannot download any Android application to take the screenshot. You can try this fantastic tool for your device.
Share this article with your friends, and I hope the will love this fantastic guide. You can share your custom recovery with everyone.
Thank you for visiting and keep visiting for more tips and tricks like this, and I will meet you in the next one. If you had any issues while taking the screenshot, then please feel free to comment below.