Motorola is the one of the famous company if you want to buy any mid-range smartphones. Motorola recently launched the amazing Moto G5 Plus. The developers are working on developing the Custom Recovery and also the ROM. This is the reason one of my favorite developer Santhosh M has come up with the unofficial TWRP recovery for the Moto G5. Today, I am going to tell you the way you can easily Unlock Bootloader, Flash TWRP, and Root your Moto G5 Plus
Also look: How to Theme Any of Your Stock Android Device
Moto G5 Plus is coming up with the all new Android 7.1.1. This ROM is beautifully modified, and the users can easily customize their Moto G5. Moto G5 Plus is the mid-range smartphone which is having 4 GB RAM and with 32 GB internal storage.
If you want to Root your phone then there are three basic steps which you need to follow to root your phone, and that is unlocked bootloader, Flash TWRP, and Root your phone. Let’s see what these 3 steps are.

- Unlocking Bootloader: If you want to do anything such as rooting and flash the recovery or root your Android device then this is the first step which you need to follow on all the Android devices. Unlocking bootloader allows the users to install the multi-ROM and flash custom ROM on their phone. This allows you to flash the ROM in the main partition of your ROM.
- Installing TWRP Recovery: If you want to root your phone or you need to install the custom recovery on your phone, then you need to have the TWRP recovery installed on your phone. This is the primary step, and if you have successfully installed the custom recovery on your phone, then you can try flashing anything on your phone.
- Rooting: This is the essential thing which everyone knows about it and rooting is the procedure which helps you to install the application with some extraordinary features. You can do changes in the system files and edit the framework of your phone.
If you have these files and application then only you can move to the next step, and if you are confused at any step then We will suggest you comment below and We will surely help you out in this matter.
Also look: Get the Pixel Amazing New & Live Earth Wallpapers on Your Android Device
Prerequisites:
- ADB and Fastboot
- Motorola USB Drivers
- Make sure that you take a complete backup of your data. This process will wipe your phone data.
How to Unlock Bootloader of Moto G5 Plus
- Firstly, you need to Go to Settings > About Phone > Build Number. You need to hit the build number 7 times, and you will get a pop-up of “You are now a developer.”
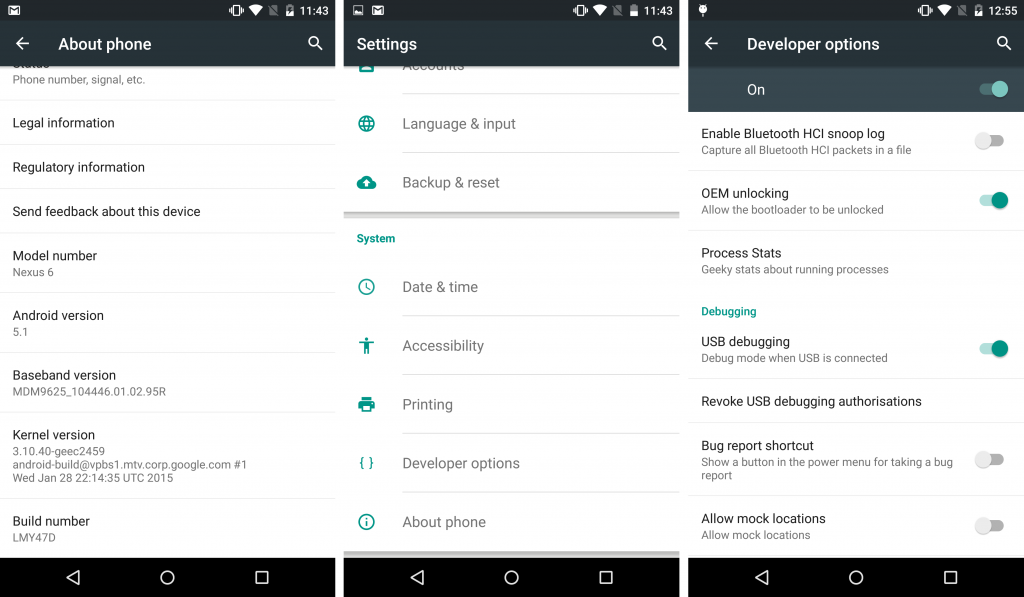
- Hit the back button, and you will find the Developer option just scroll down, and you will find an option in your settings called as Enable OEM Unlock and then confirm the warning.
- Turn on the USB Debugging mode.
- Download the above ADB drivers zip file and extract it.
- Then connect your phone to your PC and then open ADBDriverInstaller.exe and then click on install. The driver will be automatically installed on your phone.

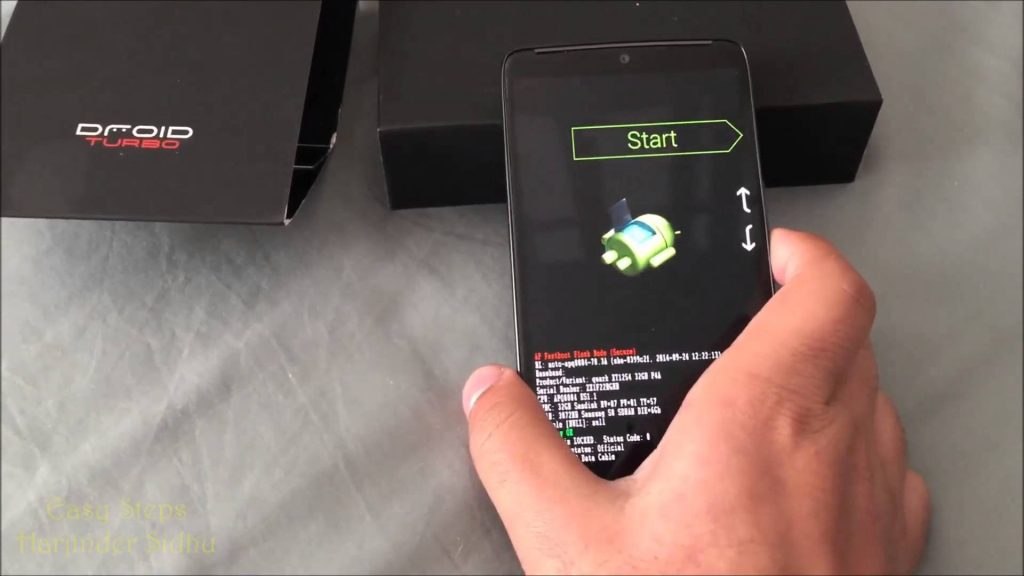
- Turn off your phone
- Now, press Volume Down + Power Key simultaneously to put your phone in the fastboot mode.
- Go to SDK > Platform tools and then press shift button and press mouse Right click you will see an option of the open command window.
- Now, just enter the below command
adb devices
- Now, you will see the serial number of your device. If it is showing you the serial number, then it is fine and working correctly. If it is not showing you anything, then you need to reconfigure fastboot drivers and repeat the above process.
- Copy the serial number somewhere, and then you visit the Motorola Unlocking Bootloader. You need to follow all the instruction properly.
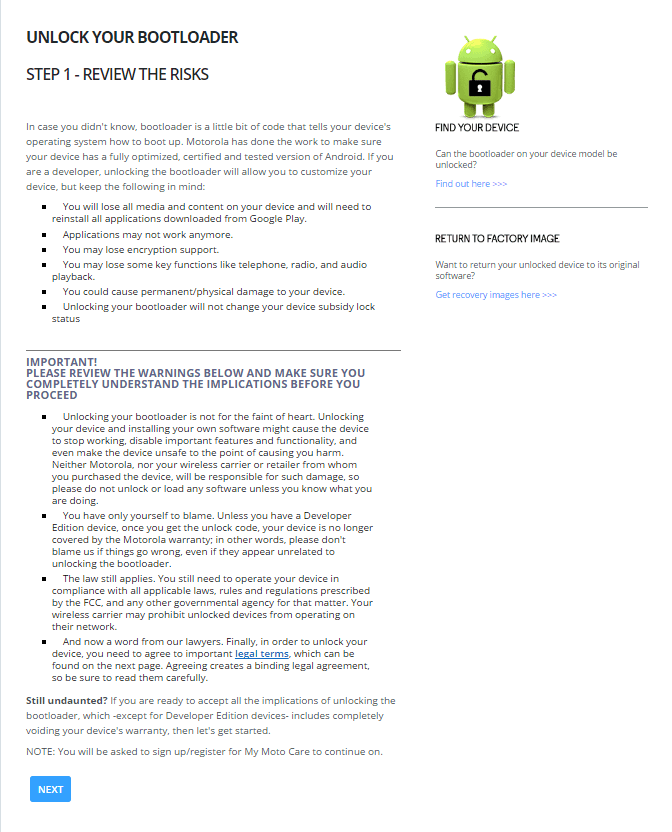
- Now, sign in with your Google account or your Motorola account and can go to next step.
- Now, open the CMD window and press fastboot oem get_unlock_data
- There you will get the code, and then you need to paste the code in Data scrub tool
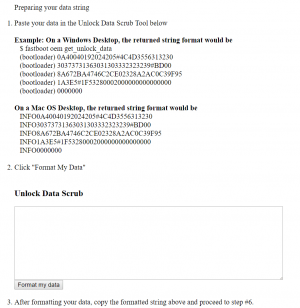
- This will throw you the warning just accept it and then done. Now, you have the unlock code, and you can move to the next step.
- Now, type the command fastboot oem unlock UNIQUE_KEY in the place of the unique key you need to add the code which you got from the data scrub tool.
- That’s it you will find the successful message, and your bootloader will be unlocked. This is it, and you are right to move to the next step.
Video Tutorial:
How to install TWRP Recovery in Moto G5 Plus
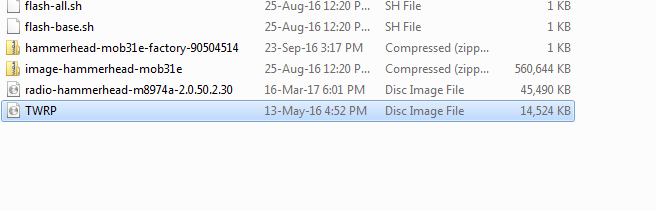
- Download the latest unofficial custom recovery from here: Download
- Move this files to the minimal ADB drivers folder and then rename it to anything you need. We will rename it to the TWRP.img
- Let’s move to the next step, and that is press Volume Down + Power Key simultaneously to put your phone in the fast boot mode.
- Now, press the shift button and press mouse Right click you will see an option of the open command window.
- Type the command to flash the, recovery on your device.
fastboot flash recovery twrp.img
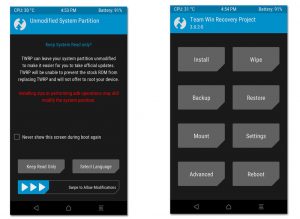
- Now, this will flash the recovery and press the volume down button and boot your phone into recovery and then it will ask you for the password.
- Just give Cancel when asking for the password and give allow modification.
- Make sure that you wipe your data using the recovery. This is suggested by the developer.
Video Tutorial:
[su_youtube url=”https://www.youtube.com/watch?v=0fGmDNZxn2g”]
How to Root Your Moto G5 Plus
Requirements:
- Magisk: Download
- no-verity-opt-encrypt-5.1.zip
- Move these files to your internal storage when you are in recovery mode.
Steps:
- Firstly you need to boot your phone into recovery and then download the below no-verity-opt-encrypt file.
- Download the no-verity-opt-encrypt-5.1.zip and move it to your
- Then click on the Install button.
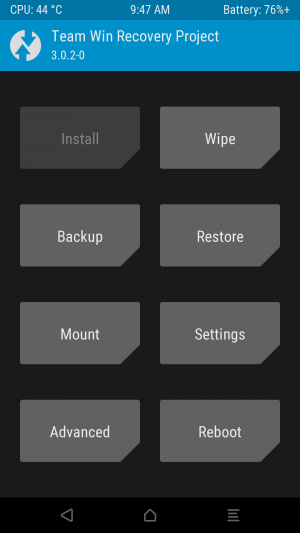
- Scroll down, and you will find the file and click on it and swipe to install the zip file on your phone.
- Click on the back button and then click on Reboot and power off your device.
- Now press Volume Down + Power Key simultaneously to put your phone in the fastboot mode.
- Press volume down key twice to boot your phone into recovery.
- Click on the Install button and search for magisk.zip.
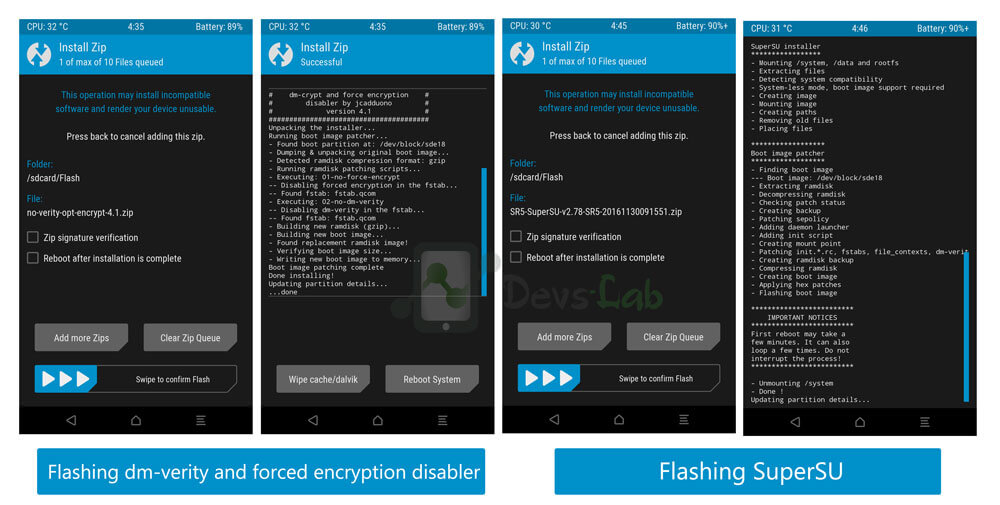
- Flash the file on your phone and done. That’s it you reboot your phone.
- Now, Turn on your phone, and it may take around 20 minutes to boot your phone on and if it is completed then move to the next step.
- Open Play Store and download Magisk manager or update it and also download Root Checker to check the root permission.
- That’s it! You have successfully rooted your phone
You can also root other devices using Towelroot Apk
Note: If TWRP suggests you to install the TWRP app just click on Do Not Install.
Final verdict:
If you have done with this process, then you have successfully rooted your phone. If you are stuck on something, then feel free to ask below in the comment section. This was the article about the way you can Unlock Bootloader, Flash TWRP, and Root your phone.
Share this article with your friends who has bought the Moto G5 Plus, and this method works in only Moto G5 Plus.
Thank you for visiting and keep visiting for more tips and tricks like this, and I will meet you in the next one.
Android Character missing from Fastboot Flash Mode nad what was the Unlocked warning on boot up now just says bad key. Is there a way to “reflash” to bring back the Android character in fastboot mode and have a motorola logo instead of “bad key” on boot up? Thanks for your anticipated cooperation.